
What you need before we start:
1) A USB stick formatted to FAT32. (Preferably compatibility issues while flashing the image).
2) Image of your choice.
3) Compression software such as 7zip, Winrar, Winzip
1. Format a USB stick to FAT32.
2. Download the image of your choice and extract it to your desktop.
Images for Vu+ UNO 4K SE

3. Copy the extracted folder “vuplus” to your USB Stick
Flashing the Receiver.
1) Power off the receiver
2) Ensure no other USB devices are plugged into the receiver while flashing
3) Insert the USB stick containing the image files into one of the USB ports on the receiver, rear USB port is advised if possible.
4) Power the receiver on.
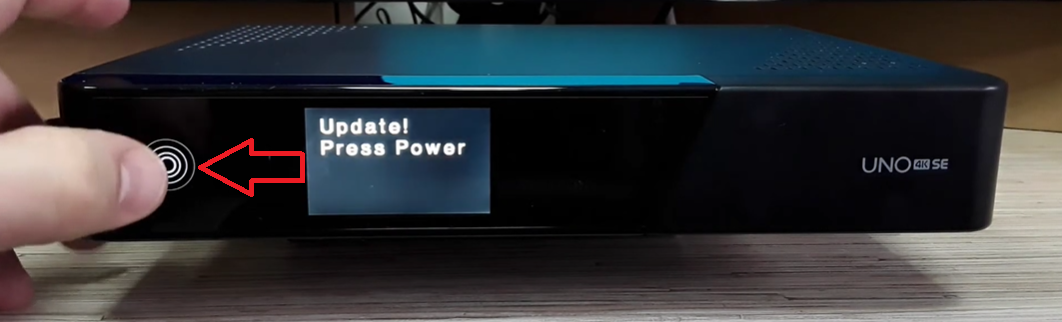
5) As your VU+ UNO 4K SE starts to power up you should see a update prompt on the receivers display asking you to press the power button, at this point you touch the power button which is located to the left front of the receiver
6) The receivers display will display various stages of flashing, simply wait for this to complete.
7) If successful the receiver will reboot itself after the flashing process has completed.
8) Remove USB stick that contains the images files.
The flashing process should take approximately two to five minutes to complete, while the receiver
is being flashed it is vitally important that you DO NOT power the receiver down for any reason as
this can cause serious and or permanent damage.
https://youtu.be/psqJDg9jXR4